
Welcome to the comprehensive guide for your Rival ice cream maker! This manual will walk you through setting up, operating, and maintaining your machine for perfect results.
Discover how to craft delicious homemade ice cream with ease, from basic recipes to advanced techniques, ensuring every batch is creamy and flavorful. Perfect for beginners and experienced makers alike!
Overview of the Rival Ice Cream Maker
The Rival Ice Cream Maker is a popular kitchen appliance designed to help you create delicious homemade ice cream with ease. Available in various models, including 1 to 4-quart capacities, it caters to both small and large batches. The machine features automatic churning, eliminating the need for manual effort. Its durable construction and user-friendly design make it a great addition to any home; With clear instructions provided, you can effortlessly craft creamy, customizable treats.
Key features include a dasher for aerating the mixture and a mixing feeder for adding ingredients during churning. The machine is equipped with a motor that handles the churning process, ensuring a smooth texture. The Rival Ice Cream Maker also comes with a comprehensive manual, guiding you through assembly, operation, and maintenance. Perfect for beginners and experienced makers, it offers endless possibilities for creating unique and mouthwatering flavors at home.
Importance of Following Instructions
Following the instructions for your Rival Ice Cream Maker is crucial for safety, optimal performance, and achieving the best results. Proper assembly and operation ensure the machine functions correctly, preventing accidents and extending its lifespan. The manual provides clear steps to avoid common mistakes, such as overloading or improper chilling, which can affect the quality of your ice cream. By adhering to the guidelines, you can enjoy smooth, creamy treats while maintaining your appliance in excellent condition for years to come.
Unboxing and Assembling the Rival Ice Cream Maker
Unbox and organize all components carefully. Ensure all parts are included and undamaged before assembly. Follow the manual’s step-by-step instructions for safe and proper setup.
Unpacking the Components
Begin by carefully unboxing your Rival ice cream maker to ensure all parts are included and undamaged. Inside, you’ll find the main unit, ice cream can, lid, dasher, mixing feeder, and tub for ice and salt. Inspect each component for any visible damage or defects. Take note of the manual provided, which outlines each part’s purpose and assembly instructions. This step is crucial for a smooth setup process. Always refer to the manual for guidance on identifying and organizing your components properly.
Assembling the Machine
Start by placing the ice cream canister into the outer tub, ensuring it is centered and secure. Next, align the dasher with the canister’s opening and gently push it down until it clicks into place. Attach the mixing feeder to the lid, making sure it fits snugly. Finally, place the lid on top of the canister and lock it in position by turning the handle clockwise. Always refer to the manual for precise alignment and tightening instructions to avoid any gaps or misalignment during assembly.
Placing the Ice Cream Canister
Place the ice cream canister into the outer tub, ensuring it is centered and aligned properly. Secure it firmly to prevent movement during churning. After unpacking, wash the canister with warm soapy water, rinse thoroughly, and dry before use. Always place the canister into the machine immediately after removing it from the freezer to maintain its temperature. Proper placement ensures even churning and prevents leakage. Follow the manual’s guidance for correct alignment and securing the canister.
Preparing Ingredients for Churning
Measure ingredients accurately and chill the mixture thoroughly before churning. A well-prepared base ensures smooth, creamy results. Avoid over-thick mixtures, as they can hinder proper churning.
Chill the mixture in the refrigerator for at least 1-2 hours to prevent ice crystals from forming. This step is crucial for achieving the perfect texture in your homemade ice cream.
Measuring Ingredients
Accurate measuring of ingredients is essential for achieving the perfect ice cream texture. Over- or under-measuring can lead to an imbalance in flavor and consistency. Use a digital scale or measuring cups to ensure precision. Most recipes require a specific ratio of cream, sugar, and flavorings to produce a smooth, creamy result. Always follow the recipe guidelines provided in your Rival ice cream maker manual for best outcomes.
The ideal mixture should be between 3/4 and 1 quart when using a standard Rival model. Avoid overfilling, as this can prevent proper churning. For mix-ins like fruits or nuts, add them during the churning process to maintain even distribution. Proper measurement ensures your homemade ice cream turns out light, airy, and full of flavor every time.
Chilling the Mixture
Chilling the ice cream mixture is a crucial step before churning. Place the mixture in the refrigerator for at least 1 to 2 hours to allow flavors to meld and ingredients to cool thoroughly. For best results, the mixture should be icy cold before pouring it into the ice cream canister. This ensures a smoother churning process and prevents ice crystals from forming.
Once chilled, remove the canister from the freezer and pour in the mixture immediately. Avoid letting the canister thaw, as this can affect the churning efficiency. Proper chilling guarantees a creamy texture and optimal flavor in your homemade ice cream.
Filling the Ice Cream Canister
Filling the ice cream canister correctly is essential for optimal churning. Pour the chilled mixture into the canister, ensuring it reaches no more than 3/4 of its capacity. Overfilling can lead to poor churning results. Gently insert the dasher into the canister, making sure it is securely positioned. Avoid splashing or introducing air bubbles, as this can affect the texture of the ice cream. Once filled, place the canister into the machine immediately to maintain its frozen temperature.
Proper filling ensures even churning and prevents overflow during the process.

Churning Process
Start the machine and let it churn for 25-40 minutes. The motor will stop once the ice cream is ready. Avoid overloading the canister for best results.
Starting the Machine
To begin, ensure the ice cream canister is properly placed and the lid is securely closed. Plug in the machine and press the power button to start. The churning process typically takes 25-40 minutes. Monitor the machine to avoid overloading. Keep the canister cold before use for optimal results. Avoid opening the lid during churning to maintain consistency. Follow these steps for smooth operation. Proper preparation ensures a creamy texture every time. Regular checks help achieve the best outcome.
- Ensure the canister is cold and securely positioned.
- Plug in the machine and press the power button.
- Allow it to churn for 25-40 minutes.
- Monitor the process to prevent overloading.
Adding Ingredients During Churning
Add mix-ins like fruits, nuts, or candy pieces through the Mixing Feeder during churning for even distribution. Ensure the machine is running before adding ingredients to avoid clogging. Introduce mix-ins gradually, about 10-15 minutes into the churning process, to maintain consistency. Avoid overloading the canister, as this may disrupt the machine’s operation. Proper timing and portion control ensure a smooth, well-blended final product. This method enhances flavor and texture, making every batch unique and delicious.
- Add mix-ins through the Mixing Feeder during churning.
- Introduce ingredients gradually to maintain consistency.
- Avoid overloading the canister for smooth operation.
Monitoring Churning Time
Monitor the churning time closely, typically between 20-40 minutes, depending on the mixture volume. The machine stops automatically when churning is complete. If using less than 3/4 of the canister’s capacity, the motor may not stop, so keep an eye on the timer. Ensure not to overload the canister, as this can disrupt the process. Proper timing ensures a smooth, creamy texture. Always follow the manufacturer’s guidelines for optimal results.
- Churning time: 20-40 minutes depending on mixture volume.
- Machine stops automatically when done.
- Check timer if using less than 3/4 capacity.

Safety Precautions
Always read the manual before use. Avoid electrical hazards and keep children away. Never attempt repairs yourself. Follow guidelines to ensure safe, enjoyable ice cream making experiences.
General Safety Guidelines
Always read the user manual thoroughly before operating the Rival ice cream maker. Ensure all electrical components are handled safely, and keep children away during use. Avoid overloading the machine and never insert hands or utensils while it’s running. Regularly clean and maintain the device to prevent malfunction. Store components securely after use to avoid accidents. Follow the manufacturer’s instructions for assembly, operation, and maintenance to ensure safe and effective ice cream making experiences.
Handling Electrical Components
When handling electrical components of your Rival ice cream maker, ensure all parts are dry to prevent shocks. Avoid submerging electrical elements in water or exposing them to moisture. Never attempt to repair or adjust electrical components yourself, as this can void the warranty and pose safety risks. Always unplug the machine before cleaning or maintaining it. Keep the power cord away from water and heat sources to ensure safe operation and longevity of the device.
Preventing Accidents
To ensure safe operation, always keep loose clothing and long hair tied back while using the Rival ice cream maker. Avoid overloading the machine, as this can cause spills or unstable operation. Keep the area around the maker clear of clutter and ensure it is placed on a stable, even surface. Never allow children to operate the machine unsupervised. Regularly inspect cords and components for damage, and avoid using the maker near water sources to prevent electrical hazards. Proper precautions will help prevent accidents and ensure smooth, enjoyable use of your ice cream maker.
Understanding the Machine Components
Understanding your Rival ice cream maker’s components is key to successful operation. The canister holds the mixture, while the dasher churns and aerates it. The mixing feeder allows adding ingredients during churning, ensuring even distribution. These parts work together to create smooth, creamy results every time.
Identifying Key Parts
Identify the key components of your Rival ice cream maker to ensure proper operation. The ice cream canister is where the mixture churns, while the dasher agitates and aerates it. The mixing feeder allows you to add ingredients during churning, ensuring even distribution. The motor powers the machine, driving the dasher. Understanding these parts is essential for smooth operation and achieving perfect results. Regularly inspect and clean them to maintain performance and longevity.
Function of the Dasher
The dasher is a vital component in the Rival ice cream maker, responsible for agitating and aerating the mixture during churning. Its motion scrapes the sides of the canister, preventing ice crystals from forming and ensuring a smooth, creamy texture. The dasher’s design allows ingredients to mix evenly, incorporating air for a lighter consistency. Proper installation and alignment of the dasher are essential for optimal performance. Regular cleaning and maintenance ensure it continues to function effectively, delivering perfect results every time.
Role of the Mixing Feeder
The mixing feeder on your Rival ice cream maker is designed to allow the addition of ingredients during the churning process. This feature enables you to introduce mix-ins, flavorings, or other components evenly without stopping the machine. Its convenient design ensures ingredients are distributed consistently, enhancing the texture and taste of your ice cream. Regular cleaning of the feeder is essential to maintain hygiene and prevent clogging. Always follow the manufacturer’s guidelines for proper use and maintenance.
Recipes and Customization
Explore endless possibilities with customizable recipes using your Rival ice cream maker. Create unique flavors, add mix-ins, and experiment with sorbet and frozen yogurt for delicious treats.
Basic Ice Cream Recipes
Start with simple, classic recipes like vanilla or chocolate. Combine cream, sugar, and flavorings, then chill and churn. These bases are perfect for mastering the churning process.
Follow the manual’s step-by-step guide for precise measurements and timings. Ensure your mixture is pre-chilled for smooth results. Experiment with mix-ins like fruit or nuts for added texture and flavor, creating customizable treats effortlessly.
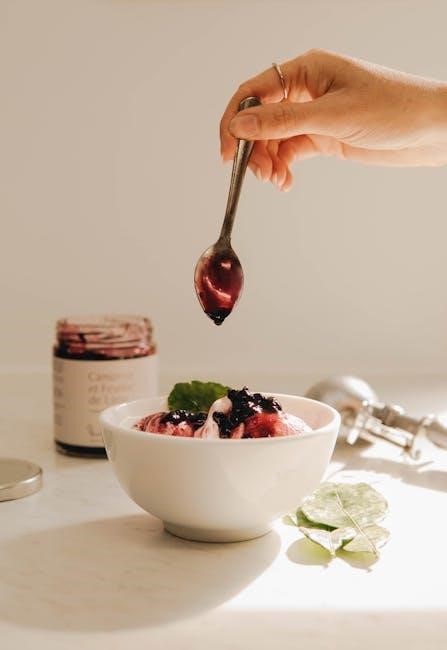
Adding Mix-Ins and Flavorings
Elevate your ice cream by adding mix-ins like nuts, chocolate chips, or fruit during the churning process. Introduce flavorings such as vanilla or cocoa powder to the base mixture before churning for enhanced taste. Use the mixing feeder to incorporate ingredients evenly. Avoid overloading the canister to ensure smooth churning. Popular additions include caramel swirls or fresh berries for unique textures and flavors. Experiment with combinations to create personalized treats that meet your taste preferences. This step allows for endless creativity!
Creating Unique Flavors
Unleash your creativity by experimenting with unique flavor combinations for your homemade ice cream. Try infusing rich flavors like matcha, lavender, or caramel into the base mixture. Incorporate fresh fruits, such as strawberries or raspberries, for vibrant and refreshing options. For a decadent treat, mix in melted chocolate or swirls of peanut butter. Don’t forget to add a pinch of sea salt for balance. The possibilities are endless, allowing you to craft one-of-a-kind flavors that cater to your taste preferences. Enjoy the fun of inventing something truly original!
Maintenance and Cleaning
Regularly clean the Rival ice cream maker to ensure optimal performance. Wash all parts with warm soapy water and dry thoroughly to prevent bacterial growth.
Store components in a cool, dry place. Check for leftover mixture and wipe down surfaces after each use to maintain hygiene and longevity of the machine.
Cleaning the Machine
Cleaning your Rival ice cream maker is essential for maintaining hygiene and performance. Start by washing all removable parts, such as the canister, dasher, and mixing feeder, with warm soapy water. Rinse thoroughly and sanitize with a solution of equal parts water and white vinegar. Wipe down the machine’s exterior with a damp cloth and avoid using abrasive cleaners. Dry all components completely to prevent water spots and bacterial growth. Regular cleaning ensures your machine runs smoothly and keeps your ice cream fresh and flavorful.
Storing the Components
After cleaning, store all components in a cool, dry place to prevent moisture buildup. The ice cream canister should be placed in the freezer immediately after cleaning to maintain its readiness for future use. Ensure all parts are completely dry before storing to avoid bacterial growth. Keep the machine and accessories away from direct sunlight and heat sources. Proper storage extends the lifespan of your Rival ice cream maker and ensures optimal performance for your next batch of homemade ice cream.
Regular Maintenance Tips
Regularly inspect and clean the machine to ensure smooth operation. Lubricate moving parts as needed to prevent wear and tear. Check for any signs of damage or corrosion on electrical components and replace them if necessary. Descale the machine periodically if you use hard water to prevent mineral buildup; Refer to your user manual for specific maintenance recommendations tailored to your Rival model. Proper upkeep ensures longevity and consistent performance for years of delicious homemade ice cream creation.

Troubleshooting Common Issues
Address common issues like the machine not turning on or ice cream not churning properly by checking power connections and ensuring proper assembly. If the canister overloads, reduce the mixture volume and restart. Regularly clean and maintain components to prevent malfunctions and ensure smooth operation for consistent results.
Machine Not Turning On
If your Rival ice cream maker won’t turn on, first check the power cord and outlet to ensure proper connection. Verify that all components are assembled correctly, as improper placement of the canister or dasher may prevent operation. Consult the user manual to confirm all parts are securely in place. If issues persist, contact customer support for assistance, as electrical components should not be repaired at home to avoid voiding the warranty.
Ice Cream Not Churning Properly
If your Rival ice cream maker isn’t churning correctly, check if the mixture is too thick or if the canister isn’t properly assembled. Ensure the dasher moves freely and the lid is securely closed. Overloading the canister or using warm ingredients can also disrupt churning. Allow the mixture to chill thoroughly before churning and verify that all components are correctly positioned for smooth operation. Consult the manual for troubleshooting steps to resolve the issue effectively.
Overloading the Canister
Overloading the canister with too much mixture can prevent the dasher from moving properly, leading to incomplete churning. This results in uneven texture and reduced creaminess. Always fill the canister no more than 3/4 full, as specified in the manual, to ensure proper churning and a smooth outcome. Exceeding this limit can strain the machine and affect performance.
To avoid overloading, measure ingredients accurately and pour gradually. Stop adding once the mixture reaches the recommended level. This ensures optimal churning and prevents mechanical issues, guaranteeing perfect homemade ice cream every time.
Additional Features and Tips
Discover additional features like timers and customizable settings. Learn to make sorbet, frozen yogurt, and enhance creaminess for versatile, professional-quality desserts at home effortlessly.
Using the Timer
The timer on your Rival ice cream maker allows you to monitor churning time accurately. Set it according to your recipe to ensure the perfect consistency. It automatically stops the machine once the cycle is complete, preventing over-churning and saving effort. This feature is especially useful for achieving soft-serve texture right out of the machine.
Pre-freeze your canister, pour in your mixture, and let the timer guide you. It’s ideal for making sorbet, frozen yogurt, or classic ice cream. Once done, transfer to an airtight container to harden. Enjoy your homemade creations!
Making Sorbet and Frozen Yogurt
Your Rival ice cream maker is versatile for crafting sorbet and frozen yogurt. For sorbet, puree your favorite fruit and churn until set. For frozen yogurt, use a non-dairy base or regular yogurt for a healthier treat. Both options require chilling the mixture before churning. Use the timer to ensure the perfect consistency, and avoid overloading the canister. These alternatives are ideal for those seeking lighter or dairy-free desserts. Simply pour, churn, and enjoy your refreshing creations!
Enhancing Creaminess
To achieve a smoother, creamier texture, use high-quality ingredients like heavy cream and real sugar. Chill the mixture thoroughly before churning to prevent ice crystals. For richer results, add a touch of cornstarch or tapioca flour as a thickening agent. Tempering eggs or using custard-based recipes can also enhance creaminess. Ensure the canister is fully frozen to maintain optimal temperature during churning.
Avoid overloading the machine, as this can disrupt the churning process. Monitor the consistency during the final stages to achieve your desired texture for perfect homemade ice cream.

Advanced Techniques
Explore expert methods to elevate your ice cream making, such as layering flavors, creating swirls, and hardening for a professional finish. Perfect for crafting unique desserts.
Layering Flavors
Layering flavors in your Rival ice cream maker allows for a multi-dimensional taste experience. Start by churning a base flavor, then pour it into a container. Add mix-ins like fruit or nuts, and freeze until set. Repeat with complementary flavors, ensuring each layer is frozen before adding the next. This technique creates a visually appealing and deliciously complex dessert. Experiment with combinations like strawberry and chocolate or caramel and sea salt for unique results. Layering adds sophistication to any homemade ice cream creation.
Creating Swirls
Creating swirls in your Rival ice cream maker adds a decorative touch to your homemade creations. To achieve this, pour a small amount of sauce, such as caramel or fudge, into the nearly churned ice cream. Use a spatula to gently fold the mixture, creating a marbled effect. Avoid overmixing to maintain the swirl pattern. For thicker swirls, chill the sauce before adding it. This technique enhances both the visual appeal and flavor of your ice cream, making it a standout dessert.
Hardening the Ice Cream
After churning, transfer the soft-serve ice cream to an airtight container and smooth the top. Place it in the freezer to harden for 2-3 hours. This step ensures a scoopable consistency. Avoid opening the container during hardening to prevent ice crystals from forming. Once hardened, your homemade ice cream is ready to serve. Proper hardening enhances texture and makes the ice cream more enjoyable. Store leftovers in the freezer to maintain freshness.
Comparing Rival Models
Rival offers a range of ice cream makers with varying capacities and features. Models differ in size, from 1-quart to 4-quart options, catering to different needs and preferences.
Differences in Capacity
Rival ice cream makers come in various sizes, including 1-quart, 2-quart, and 4-quart models. The 1-quart is ideal for small batches, while the 4-quart is perfect for larger gatherings. Choose the size that fits your needs for convenience and efficiency.
Larger capacities allow for more ice cream in one go, saving time. Smaller models are great for personal use or testing recipes. Consider batch size and storage space when selecting your model.
Unique Features of Each Model
Rival offers models with distinct features to enhance your ice cream-making experience. Some include built-in timers, automatic shut-off, and easy-lock lids for convenience. Higher-end models may feature advanced cooling systems for faster churning and creamier results.
Certain models also include interchangeable bowls, allowing you to prepare multiple batches without waiting. Look for features like adjustable speeds or built-in mixers for adding ingredients seamlessly during churning. These innovations make each model tailored to specific user preferences.
Choosing the Right Model
Rival offers a variety of ice cream maker models to suit different needs. Consider the capacity, ranging from 1 to 4 quarts, depending on batch size preferences. Some models feature advanced timers, automatic shut-off, and easy-lock lids for convenience. If you prioritize speed and creaminess, look for models with built-in cooling systems. Assess your budget, kitchen space, and desired features to select the ideal model for your ice cream-making endeavors.
With these instructions, you’re ready to craft delicious homemade ice cream effortlessly. Enjoy experimenting with flavors and techniques to create your perfect frozen treats every time!
Final Tips for Perfect Ice Cream
For the best results, ensure your ice cream canister is thoroughly chilled before use and avoid overfilling it. Use high-quality ingredients and experiment with flavors to create unique recipes.
Always monitor the churning process and stop when the desired consistency is reached. Chilling the mixture beforehand ensures a creamier texture. Enjoy crafting delicious, personalized treats with your Rival ice cream maker!
Enjoying Your Homemade Creations
There’s nothing quite like savoring a scoop of freshly made ice cream, crafted with your own hands; The Rival ice cream maker allows you to create customizable treats that cater to your taste preferences, ensuring every batch is a delight. Whether you’re making classic vanilla, vibrant sorbet, or rich chocolate, the satisfaction of homemade desserts is unmatched.
Share your creations with family and friends or indulge in a sweet treat any time of the day. The versatility of your Rival machine ensures endless possibilities for delicious, personalized frozen delights. Enjoy the joy of homemade ice cream, perfected to your liking!