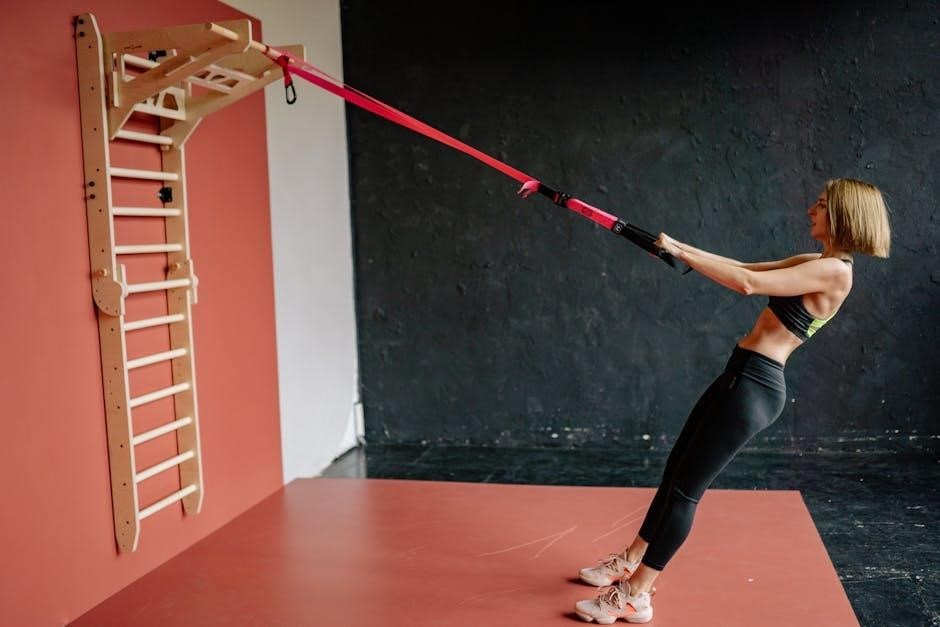
Resistance band exercises are a fantastic, low-cost entry point into strength training, offering a joint-friendly way to build muscle and improve fitness for all levels.
What are Resistance Bands?
Resistance bands are large elastic bands, often made of latex or rubber, used to create tension and provide resistance during exercise. They come in varying lengths and resistance levels, offering a versatile tool for strength training. Unlike traditional weights, resistance bands are lightweight, portable, and incredibly affordable, making them ideal for home workouts or travel.
These bands work by challenging your muscles throughout the entire range of motion, promoting muscle growth and strength gains. They’re a fantastic alternative or supplement to free weights, particularly for beginners, as they reduce the risk of injury due to their low-impact nature. They are simple to use, yet incredibly effective!
Benefits of Resistance Band Training
Resistance band training offers a multitude of benefits for beginners and seasoned fitness enthusiasts alike. They provide a low-impact workout, minimizing stress on joints, making them suitable for individuals with injuries or joint pain. Bands are incredibly versatile, allowing you to target all major muscle groups with a wide range of exercises.
Portability is a key advantage – you can easily take your workout anywhere! They’re also cost-effective compared to expensive gym memberships or weight equipment. Research demonstrates that resistance bands can build comparable strength and muscle to free weights. Furthermore, the variable resistance adapts to your strength, promoting continuous progress.
Types of Resistance Bands
Resistance bands come in various forms, each suited for different fitness goals and preferences; TheraBands, flat elastic bands, are commonly used for rehabilitation and general strength training, offering light to moderate resistance. Tube bands with handles provide a more secure grip and are ideal for a wider range of exercises, often available in varying resistance levels.
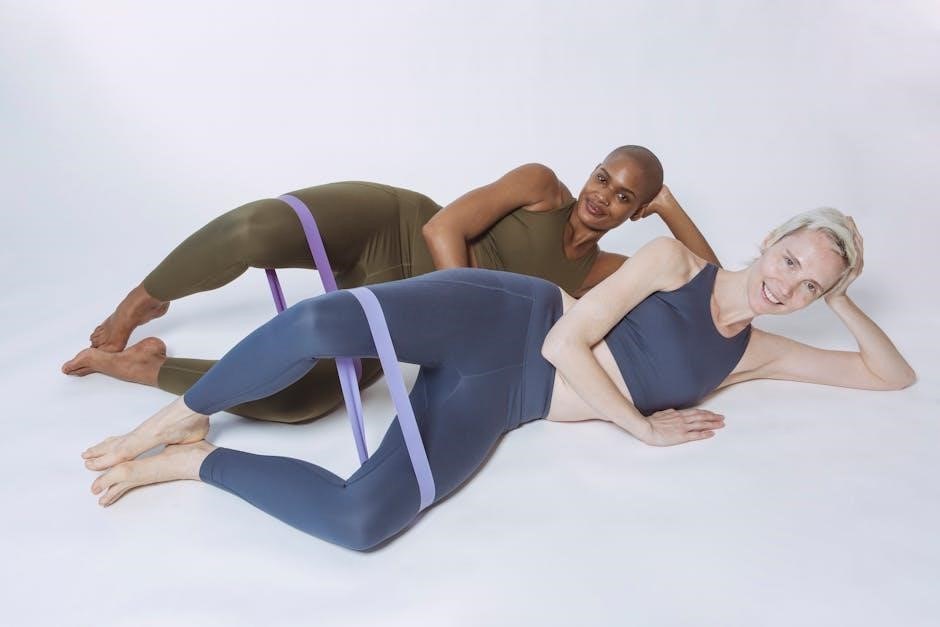
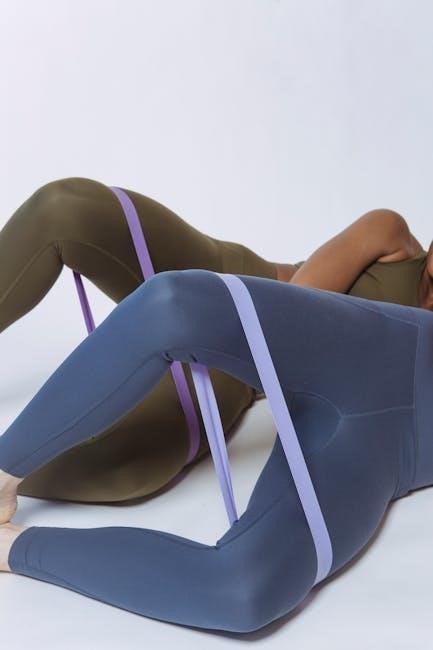
Loop bands, or mini bands, are smaller circles used primarily for lower body exercises, activating glutes and legs. Finally, figure-8 bands offer unique movement patterns and are excellent for rotational exercises. Choosing the right type depends on your exercise focus and desired intensity.

Getting Started with Resistance Band Workouts
Begin your resistance band journey by selecting appropriate resistance, warming up properly, and mastering correct form to maximize benefits and prevent injury.
Choosing the Right Resistance Level
Selecting the correct resistance is crucial for effective and safe workouts. Beginners should start with lighter bands, focusing on mastering proper form before increasing intensity. If you can comfortably perform 12-16 repetitions with good technique, the resistance is likely appropriate.
Resistance bands typically come in varying colors, each representing a different resistance level – often labeled as light, medium, and heavy. Don’t be afraid to experiment! It’s better to begin with too little resistance than too much, which can compromise form and increase injury risk.
As you grow stronger, gradually progress to heavier bands or by doubling up lighter bands to increase the challenge. Remember, progressive overload – gradually increasing the stress on your muscles – is key to continued strength gains.
Warm-up Exercises
Prior to any resistance band workout, a dynamic warm-up is essential to prepare your muscles and joints for activity. This increases blood flow, improves flexibility, and reduces the risk of injury. Begin with 5-10 minutes of light cardio, such as marching in place or jumping jacks.
Follow this with dynamic stretches like arm circles, leg swings, and torso twists. Incorporate band-specific movements with very light resistance, like band pull-aparts or mini-squats with a band around your thighs.
These movements mimic the exercises you’ll be performing, further preparing your body. A proper warm-up ensures optimal performance and helps you get the most out of your resistance band training session.
Proper Form and Technique
Maintaining correct form is paramount when performing resistance band exercises to maximize effectiveness and prevent injuries. Focus on controlled movements throughout each exercise, avoiding quick or jerky motions. Engage your core muscles to stabilize your body and maintain a neutral spine.
Keep your elbows slightly bent during bicep curls and tricep extensions, and maintain a straight back during seated rows. For lower body exercises, ensure your knees track in line with your toes during squats and glute bridges.
Pay attention to band placement and tension – a consistent pull is key. If you’re unsure about proper form, consult videos or a fitness professional.
Upper Body Exercises
Target your arms, back, and shoulders with exercises like bicep curls, tricep extensions, seated rows, lateral raises, and reverse flyes using resistance bands.
Bicep Curls
Bicep curls with resistance bands are a superb starting point for upper body strength. Secure the band under your feet, holding the handles with palms facing forward. Keep your elbows close to your sides throughout the movement. Slowly curl the handles upwards, contracting your biceps, and then lower them back down with control.
Begin with lighter resistance to master the form, aiming for 1-3 sets of 12-16 repetitions. Focus on a slow, controlled motion, avoiding swinging or using momentum. As you gain strength, you can increase the resistance by using a heavier band or shortening the length of the band you’re holding. Proper form is crucial to prevent injury and maximize effectiveness. Remember to breathe consistently throughout the exercise.
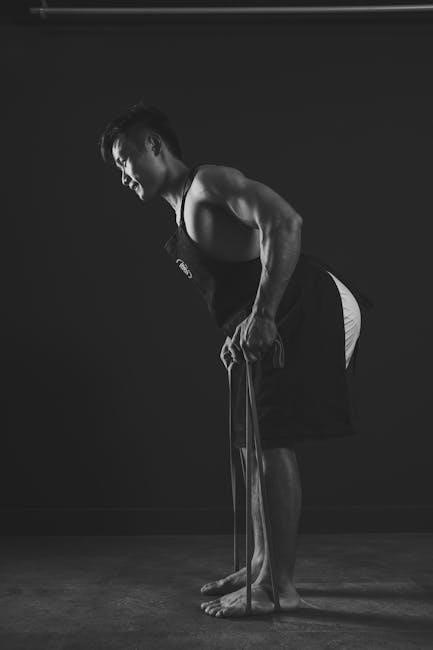
Tricep Extensions
Tricep extensions using a resistance band effectively target the back of your upper arms. Secure one end of the band overhead – you can use a door anchor or a sturdy overhead fixture. Hold the other end of the band with both hands behind your head, elbows bent; Extend your arms upwards, straightening your elbows and focusing on contracting your triceps.
Slowly lower your hands back to the starting position, maintaining control throughout the movement. Start with a lighter band and perform 1-3 sets of 12-16 repetitions. Ensure your elbows remain pointed towards the ceiling to isolate the triceps. Avoid flaring your elbows outwards. Consistent, controlled repetitions are key for building strength and definition.
Seated Rows
Seated rows with a resistance band are excellent for strengthening your back and improving posture. Sit on the floor with your legs extended and loop the band around your feet, holding the ends in each hand. Maintain a straight back and engage your core. Pull the band towards your torso, squeezing your shoulder blades together.
Keep your elbows close to your body throughout the movement. Slowly return to the starting position, resisting the pull of the band. Perform 1-3 sets of 12-16 repetitions, choosing a band that provides moderate resistance. Focus on controlled movements and proper form to maximize effectiveness and prevent injury. This exercise builds upper back strength.
Lateral Raises
Lateral raises effectively target your shoulder muscles, contributing to upper body strength and definition. Stand with your feet shoulder-width apart, stepping on the middle of the resistance band. Hold the ends of the band in each hand, palms facing your body. Keeping a slight bend in your elbows, raise your arms out to the sides until they reach shoulder height.
Avoid shrugging your shoulders during the movement; focus on isolating the deltoid muscles. Slowly lower your arms back to the starting position, maintaining control. Complete 1-3 sets of 12-16 repetitions, selecting a band offering moderate resistance. Proper form is crucial to prevent shoulder strain.
Reverse Flyes
Reverse flyes are excellent for strengthening the rear deltoids and upper back muscles, improving posture and shoulder stability. Secure the resistance band around a stable object at chest height, or step on the band’s center. Holding the ends, hinge slightly at the hips, keeping your back straight. With a slight bend in your elbows, pull the band outwards, squeezing your shoulder blades together.
Focus on initiating the movement with your back muscles, not your arms. Slowly return to the starting position, controlling the resistance. Perform 1-3 sets of 12-16 repetitions, choosing a band that provides moderate challenge. Maintaining proper form prevents injury and maximizes effectiveness.
Lower Body Exercises
Resistance bands effectively target legs and glutes, offering versatile exercises like squats, glute bridges, and kickbacks for building strength and stability.
Squats
Resistance band squats are a foundational lower body exercise, enhancing traditional squats with added tension. To perform, place the band around your thighs, just above your knees. Stand with feet shoulder-width apart, maintaining a neutral spine and engaged core. Lower your hips as if sitting back into a chair, keeping your back straight and chest up.
Ensure your knees track in line with your toes throughout the movement. The band provides constant resistance, challenging your glutes and quads more effectively. Focus on controlled movements, both during the descent and ascent. Beginners should start with lighter resistance bands and gradually increase the tension as strength improves. Aim for 3 sets of 12-16 repetitions, prioritizing proper form over the number of reps.
Glute Bridges
Resistance band glute bridges effectively target the glutes and hamstrings, enhancing lower body strength and stability. Position the band around your thighs, just above your knees. Lie on your back with knees bent and feet flat on the floor, hip-width apart. Engage your core and squeeze your glutes as you lift your hips off the floor, creating a straight line from your shoulders to your knees.
The band adds resistance, intensifying the glute activation. Hold the contracted position briefly, then slowly lower your hips back to the starting position. Maintain control throughout the exercise, avoiding arching your back. Beginners should begin with lighter bands and focus on proper form. Perform 3 sets of 12-16 repetitions.
Standing Glute Kickbacks
Resistance band standing glute kickbacks are excellent for isolating and strengthening the glute muscles. Secure the band around both ankles. Stand with feet hip-width apart, maintaining a slight bend in your supporting leg. Keep your core engaged and back straight. Slowly extend one leg backward, squeezing your glute at the top of the movement.
Focus on controlled motion, avoiding swinging or using momentum. The resistance band provides constant tension throughout the exercise. Return your leg to the starting position with control. Beginners should start with a lighter band and prioritize proper form to prevent injury. Aim for 3 sets of 12-16 repetitions per leg.
Lateral Walks
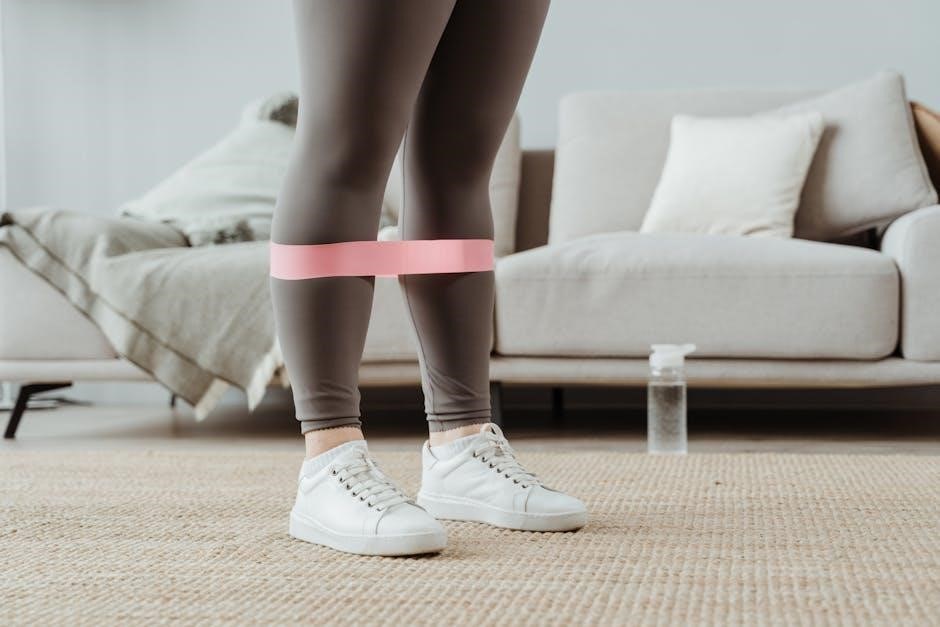
Resistance band lateral walks effectively target the gluteus medius, crucial for hip stability and preventing knee pain. Place a resistance band around your ankles or just above your knees. Stand with feet hip-width apart, knees slightly bent in a quarter-squat position. Maintain a straight back and engaged core throughout the exercise.
Slowly step sideways, keeping tension on the band. Follow with the other foot, maintaining the quarter-squat position. Avoid letting your knees cave inward. Take 10-15 steps in one direction, then repeat in the opposite direction. Beginners should start with a lighter band and focus on controlled movements. Perform 3 sets of 10-12 repetitions per side.
Hamstring Curls
Resistance band hamstring curls are excellent for isolating and strengthening the hamstrings, contributing to improved leg strength and stability. Securely anchor a resistance band to a stable object at ankle height. Attach the other end of the band around your ankle. Stand facing the anchor point, maintaining a slight bend in your knee.
Keeping your upper body stable and core engaged, slowly curl your heel towards your glutes, resisting the pull of the band. Focus on squeezing your hamstring muscle at the peak of the contraction. Slowly return to the starting position, controlling the movement. Perform 3 sets of 12-15 repetitions on each leg, using a band appropriate for your strength level.
Core Exercises
Resistance band core exercises effectively target abdominal and back muscles, enhancing stability and strength. These movements improve posture and overall functional fitness.
Resistance Band Russian Twists
Resistance Band Russian Twists are a dynamic core exercise that effectively targets your obliques, rectus abdominis, and lower back muscles. To perform this exercise, sit on the floor with your knees bent and feet slightly elevated; Secure a resistance band around your feet, holding the ends with both hands.
Lean back slightly, maintaining a straight spine, and twist your torso from side to side, bringing the resistance band with you. Focus on controlled movements and engaging your core throughout the exercise. Beginners should start with lighter resistance and fewer repetitions, gradually increasing the challenge as their strength improves. Aim for 3 sets of 12-15 repetitions on each side, ensuring proper form to avoid injury. This exercise enhances rotational strength and core stability.
Wood Chops
Resistance Band Wood Chops are a fantastic exercise for developing rotational power and strengthening your core, obliques, and lower back. Anchor the resistance band securely at a low point, and stand with your feet shoulder-width apart, holding the band with both hands.
Start with the band across your body, then powerfully rotate your torso and “chop” downwards and across your body, as if chopping wood. Maintain a slight bend in your knees and keep your core engaged throughout the movement. Beginners should use a lighter resistance band and focus on controlled motions. Perform 3 sets of 10-12 repetitions on each side, prioritizing form over speed to maximize effectiveness and prevent injury. This exercise builds functional strength.

Creating a Beginner Workout Routine
Beginner routines should incorporate exercises for all major muscle groups, using lighter bands and focusing on proper form for 1-3 sets of 12-16 reps.
Sample Workout Schedule
Here’s a sample weekly schedule to get you started with resistance band training. Remember to listen to your body and adjust as needed! Monday: Focus on upper body – Bicep curls (3 sets of 12-16 reps), Tricep extensions (3 sets of 12-16 reps), and Seated rows (3 sets of 12-16 reps). Wednesday: Target your lower body with Squats (3 sets of 15-20 reps), Glute bridges (3 sets of 15-20 reps), and Standing glute kickbacks (3 sets of 15-20 reps per leg).
Friday: Work your core with Resistance band Russian twists (3 sets of 15-20 reps per side) and Wood chops (3 sets of 12-16 reps per side). Always include a 5-10 minute warm-up before each workout and a cool-down stretch afterward. This schedule provides a balanced approach, allowing for adequate recovery between sessions. As you progress, you can increase the number of sets, reps, or resistance level.
Progression and Increasing Resistance
As you gain strength, progressively increasing the resistance is crucial for continued muscle growth and adaptation. One simple method is to switch to a heavier resistance band. Alternatively, you can increase the number of repetitions within each set, aiming for the higher end of the recommended range (16-20 reps). Another technique involves slowing down the tempo of each exercise, increasing the time under tension.
You can also try decreasing rest time between sets to challenge your cardiovascular system. Combining these methods allows for a gradual and sustainable increase in difficulty; Remember to prioritize proper form over increasing resistance too quickly, preventing injuries and maximizing effectiveness. Consistent progression is key to achieving your fitness goals!
Safety Considerations
Prioritize safety by inspecting bands for damage before each use, avoiding overstretching, and securing bands properly to prevent snapping or injury during workouts.
Avoiding Injuries
Beginners should prioritize proper form over resistance level to prevent strains and injuries. Always start with lighter bands and master the movement before increasing the challenge. Inspect resistance bands before each workout, discarding any with cracks, tears, or signs of wear.
Controlled movements are crucial; avoid snapping or jerking the bands, as this can lead to muscle pulls or band breakage. Warm-up adequately before each session, focusing on dynamic stretches that prepare the muscles for exercise. Pay attention to your body and stop immediately if you experience any pain.
Secure the band properly to a stable object, ensuring it won’t slip or move during the exercise. Avoid anchoring bands to unstable surfaces. Proper technique minimizes risk and maximizes the benefits of resistance band training.
Proper Band Storage
Extend the lifespan of your resistance bands by storing them correctly when not in use. Avoid direct sunlight and extreme temperatures, as these can degrade the latex and cause them to lose elasticity. A cool, dark, and dry place is ideal for long-term storage.
To prevent tangling and damage, store bands individually or in sets, coiled loosely or laid flat. Avoid tightly winding or knotting them, as this can create weak points and lead to breakage during workouts. Consider using a dedicated storage container or bag to keep them organized.
Regularly inspect bands for wear and tear, even during storage. Proper storage contributes to safety and ensures your bands remain effective for numerous workout sessions, maximizing your investment.